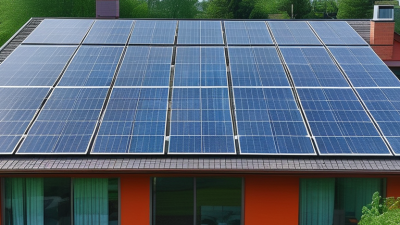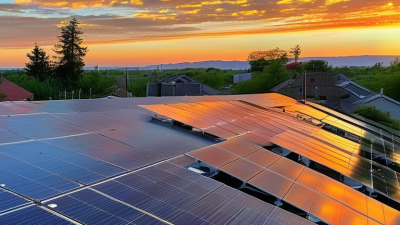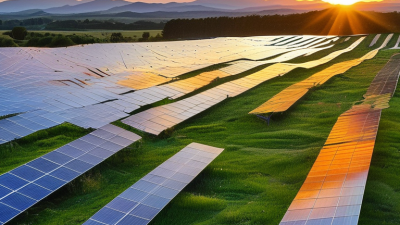
Buying modern solar roofs is not simply a design decision. It is a long-term investment involving energy production, weather protection, maintenance, and home value.
Elon Musk, a prominent figure in solar roofing, once described the concept clearly: “The solar roof is not just a solar panel on a roof. It is a roof.” That distinction matters. A quality system should resemble ordinary roofing while producing electricity from sunlight. However, attractive glass tiles do not guarantee strong performance. Buyers must examine efficiency ratings, roof pitch, shade patterns, local climate, warranty terms, and installer experience. Small details matter. A chimney can cast a surprising shadow.
Your electricity usage also deserves careful attention. Review twelve months of utility bills before comparing systems. A household with electric heating may need a very different design from one using natural gas. Battery storage can improve resilience, but it adds cost, weight, and replacement considerations. Do not assume the largest system is the smartest choice.
Some recommendations may still feel uncertain. Solar technology changes quickly, and advertised savings depend on future utility prices. I have seen homeowners focus on appearance and overlook roof repairs beneath the system. That mistake can become expensive. Ask for a written production estimate, equipment specifications, maintenance responsibilities, and realistic payback assumptions. Confirm that the installer has completed comparable projects in your region. The best modern solar roofs balance performance, durability, appearance, and honest expectations—not marketing promises.
A modern solar roof should match your home’s real energy use, not a sales estimate. Review twelve months of electricity bills and mark seasonal changes. Heating, cooling, electric vehicles, and water heaters can shift demand sharply. Shade changes everything. Observe shadows from trees, chimneys, and nearby buildings during morning and afternoon hours.
Tip 1: Request a site assessment with measured roof angles, usable area, and hourly shade data. An experienced solar professional should explain expected production in plain language. Ask about roof age and structural condition before installation. Replacing an aging roof later can increase costs and disrupt the system. I once underestimated winter demand because summer bills looked unusually low. That assumption was careless.
Tip 2: Compare your daily energy profile with the roof’s likely production. Solar output often peaks while many homes are empty. Consider storage only after checking evening consumption and backup priorities. A qualified electrician can review panel capacity, wiring, and local connection requirements. Keep a written record of assumptions, including weather losses and future household changes. Small details matter. Do not treat an online calculator as a final design. It may ignore nearby shade, roof ventilation, or your growing electricity needs.
Modern solar roofs come in several forms, and appearance is only one part of the decision. Solar shingles blend with the roof surface and suit clean, contemporary homes. Their integrated design can be visually impressive. However, repairs may require specialized labor, and replacement costs can be higher. Solar tiles offer a similar appearance, but their output depends heavily on the roof’s angle, shade, and tile layout.
Traditional framed panels usually provide stronger energy performance per square meter. They can be mounted above existing shingles, which may reduce installation time and simplify future servicing. The tradeoff is a more visible structure, especially on low-slope roofs. Before choosing, compare panel spacing, roof edges, vents, and skylights. A small roof may lose valuable generation capacity because of these obstacles.
Design also includes color, panel arrangement, wiring, and battery placement. Dark panels often create a uniform appearance, while varied layouts may look less balanced from the street. Check the roof’s age first. Installing new solar equipment on aging shingles can lead to duplicated labor. Ask an installer to assess wind exposure, drainage, electrical load, and local permit requirements. Request projected annual production, not just peak output. Real homes experience cloudy days, seasonal shadows, and occasional equipment faults. My own preference would be a clean integrated design, but I would not choose it without reviewing repair access and long-term maintenance records. Feature matters less than dependable performance.
Comparing common solar roof design options by their typical conversion-efficiency ranges
Conventional rooftop panels generally provide the highest efficiency and the broadest design flexibility. Solar shingles and integrated solar tiles offer a more seamless appearance but commonly deliver lower efficiency because of their smaller formats, installation constraints, and roof-integration requirements. Thin-film systems can work well on lightweight or low-slope surfaces, although they typically require more roof area for the same electricity output. Actual performance varies with cell technology, roof orientation, shading, temperature, and installation quality.
10 Tips for Buying Modern Solar Roofs
Efficiency should be measured against your roof, not a showroom number. Fraunhofer ISE’s 2024 Photovoltaics Report places leading commercial modules above 23% efficiency. Higher efficiency can produce more electricity from a small roof. However, shaded vents, chimneys, and winter snow may reduce real output. Request an annual production estimate using your roof’s direction, pitch, and local weather records. Ask whether the estimate includes system losses. Many quotes do not explain them clearly.
Durability deserves equal attention. NREL’s PV Lifetime Project reports median degradation near 0.5% per year for crystalline-silicon modules. That equals roughly 12% lost output after 25 years, assuming steady performance. Check the product warranty’s degradation curve, tested service life, and repair terms. Review certifications under IEC 61215 and IEC 61730. These standards address environmental testing and electrical safety. A roof also needs compatible flashing and drainage. Water trapped beneath integrated panels can create expensive problems.
Weather resistance is not a decorative feature. IEA PVPS Task 13 identifies moisture ingress, hotspots, and connection failures among recurring field issues. Ask for tested wind, snow, hail, and temperature limits. Local building requirements still matter. A strong hail rating cannot compensate for poor installation. I would inspect roof penetrations after heavy rain, even when the system appears perfect. Small defects become obvious later. Choose accessible components, documented maintenance procedures, and monitoring that shows sudden output changes. ━?
| Tip | Evaluation Dimension | What to Check | Practical Benchmark | Why It Matters | Buyer Action |
|---|---|---|---|---|---|
| 1 | Power-conversion efficiency | Review the module or integrated solar-shingle efficiency stated on the technical datasheet under standard test conditions. | Approximately 18%–23% is a common current range for mainstream crystalline-silicon residential products; higher efficiency usually requires a higher purchase price. | Higher efficiency can produce more electricity from the same roof area, which is important when usable roof space is limited. | Compare rated efficiency together with total system cost, not as an isolated number. |
| 2 | Temperature performance | Check the temperature coefficient of maximum power, usually expressed as a percentage loss per degree Celsius above the test temperature. | A smaller negative coefficient is better; many crystalline-silicon products fall near −0.25% to −0.40% per °C. | Solar modules generally produce less power as cell temperature rises, so hot climates can increase the value of better temperature performance. | Ask for modeled annual output based on the local climate rather than relying only on the nameplate rating. |
| 3 | Long-term energy degradation | Read the product warranty for the permitted annual degradation rate and the remaining power level at the end of the warranty period. | Many modern products specify about 0.25%–0.50% annual degradation after an initial first-year reduction, although terms vary by product. | Lower degradation helps preserve electricity production over the system’s operating life. | Request the first-year degradation rate, annual rate thereafter, and end-of-term guaranteed output in writing. |
| 4 | Wind resistance | Verify the tested positive and negative mechanical-load ratings and confirm that the mounting method is approved for the local wind zone. | Common tested ratings are around 2,400 Pa for wind pressure and 5,400 Pa for snow pressure, but the required level depends on the structure and local code. | Correct structural design and attachment reduce the risk of uplift, movement, and roof damage during severe wind events. | Have a qualified installer confirm roof framing, attachment spacing, edge zones, and local building requirements. |
| 5 | Hail and impact resistance | Look for documented impact testing and identify the test standard, projectile size, and impact speed. | IEC 61215 testing is widely used for module qualification; enhanced hail classifications or impact ratings may be preferable in hail-prone areas. | Impact-resistant glass and construction can reduce the likelihood of cracked modules or damaged solar roofing after hailstorms. | Match the product’s documented impact performance to the local hail history and insurance requirements. |
| 6 | Water resistance and roof integration | Examine flashing, underlayment, drainage paths, penetrations, and the transition between solar sections and conventional roofing. | The roof assembly should comply with applicable local roofing and electrical codes and include a documented water-management design. | A high-performing solar product cannot compensate for poor flashing or installation practices that allow leaks. | Obtain a roof-detail drawing and confirm who is responsible for leak repairs and roof-system warranties. |
| 7 | Moisture, corrosion, and salt exposure | Check environmental testing, corrosion protection, connector compatibility, and suitability for coastal or high-humidity locations. | Look for documented damp-heat and environmental qualification testing, with marine-grade installation hardware where exposure demands it. | Moisture and salt can accelerate corrosion, insulation problems, and connector failure over time. | Tell the installer the site’s distance from the coast, humidity level, and any exposure to salt spray or chemicals. |
| 8 | Shade and partial-output behavior | Evaluate roof orientation, nearby trees, chimneys, dormers, and whether the system uses module-level power electronics. | Module-level optimizers or microinverters can reduce the effect of mismatch, but they cannot eliminate energy losses caused by shading. | Accurate shade analysis improves production estimates and helps avoid placing solar roofing in persistently shaded areas. | Request an hourly or monthly shade report and compare projected output with and without planned tree growth. |
| 9 | Fire safety and electrical compliance | Confirm the roof assembly’s fire classification, rapid-shutdown capability, grounding method, disconnects, and applicable electrical certifications. | The system should satisfy the electrical and fire codes adopted in the installation location; requirements can differ by jurisdiction and roof type. | Proper compliance protects occupants, emergency responders, property, and the system’s eligibility for inspection and interconnection. | Use licensed professionals and obtain permits, inspection records, and the final electrical documentation. |
| 10 | Warranty, maintenance, and serviceability | Separate product, performance, roof-waterproofing, workmanship, inverter, and labor coverage; check exclusions and response procedures. | Many residential solar products offer roughly 10–15 years of product coverage and 25–30 years of performance coverage, but exact terms vary widely. | Clear coverage and accessible replacement parts can lower long-term ownership risk when components fail or roof work is needed. | Confirm transferability, claim documentation, monitoring access, maintenance needs, and who performs future repairs. |
Note: Performance, load ratings, fire classifications, warranties, and code requirements vary by product, roof design, climate, and jurisdiction. Always verify current technical documents and obtain a site-specific assessment before purchase.
A modern solar roof should begin with a site inspection, not a glossy estimate. NREL’s 2024 U.S. Solar Photovoltaic System Cost Benchmark reported residential costs near $2.68 per watt before incentives. Integrated roofing can cost more because installers remove, replace, and waterproof roof sections. Request separate line items for roofing, electrical work, permits, labor, and battery storage. Small exclusions can become expensive surprises.
Incentives deserve careful checking. IRS guidance has allowed a 30% residential clean energy credit for qualifying solar equipment and installation costs, subject to current law and eligibility. Local rebates, utility credits, and net-metering rules vary by address. SEIA and Wood Mackenzie reported continued growth in U.S. residential solar, but policy changes can affect payback estimates. Ask for calculations using conservative electricity-price assumptions.
Warranties are not interchangeable. Read the coverage for panels, inverters, roof membranes, workmanship, leaks, and removal costs. A long equipment warranty may exclude installation defects. Financing advertisements often highlight monthly payments instead of total repayment. Compare cash price, loan term, interest rate, dealer fees, and prepayment rules. A shorter loan may strain your budget, yet a longer one can reduce savings. I would also request three written bids and verify installer licensing, insurance, and recent local references. One overlooked weakness remains shade: a beautiful roof cannot overcome poor solar access.
A modern solar roof is a long-term building decision, not just an energy upgrade. Ask installers for licensing, insurance, completed projects, and local references. Verify their electrical and roofing experience separately. A beautiful proposal means little if water enters through poorly sealed flashing. Request a written roof assessment, system design, expected output, and maintenance responsibilities before signing.
Tip 1: Inspect the roof first. Damaged decking or aging shingles may require replacement before installation. Tip 2: Compare workmanship warranties, equipment warranties, and response times. They are not the same. Tip 3: Confirm permits, inspections, and grid-connection procedures with the installer. Local rules can change, so written confirmation matters.
Plan for routine care from the beginning. Keep access paths clear for inspections, and ask how technicians will check wiring, drainage, mounting points, and monitoring equipment. Dust, leaves, salt air, and severe weather can reduce performance. A maintenance schedule should explain cleaning methods and inspection intervals. Avoid pressure washing unless a qualified professional approves it.
Tip 4: Record installation photos and serial numbers. Tip 5: Learn the monitoring app before problems appear. Tip 6: Ask who handles repairs after the original crew leaves.
I once underestimated how useful simple records could be. Small details matter. No plan is perfect, and projected savings may not match real household usage. Review the assumptions carefully, especially energy prices, shading, roof access, and future repairs.